Wednesday, October 28, 2015

Create shoes...recklessly!

As some of you know, one of the very first things I made with leather was a shoe. One silver high-heeled, wearable shoe with Swarovski crystal inlays. But, alas, I only made one.


But that's about to change! While I won't be making another one of these fancy ladies, I am set on making a pair of embellished tennis shoes. I recently stumbled upon this Kickstarter campaign and I couldn't resist. I exchanged emails with the founders of the ONEDAY Sneaker Kit and they made a new fan.


Why not join me? Consider backing their Kickstarter campaign and lets make some shoes together! Many of the techniques in Beautiful Leather Jewelry will work for the shoes and the Create Recklessly with leather toolkit and hardware would add beautiful embellishments.


Isn't it fun to live in a world where we can support and play with artists in the Netherlands with just a click of a button?

Have a great week!

Melissa

Wednesday, April 1, 2015

Don't discard those oyster forks yet!


Okay, so we had some fun this April Fools and if you are a blog subscriber you received our "ad" in your email. But now, in all seriousness on this not so serious day, we have lots of great news to share!

Today starts a new chapter of Create Recklessly. Our product line of leather tools by Beadsmith was previewed in January at the CHA show and has since been featured in Tucson, at the Craft, Stitch and Hobby Show in the UK, on JTV and is making its way into bead stores. 

Leather patchwork kits from JTV
In the coming months we will have sneak peaks at the new artists joining our team and the amazing products they are creating. Until then, we will bring you some new techniques for leatherwork and more, starting with new ways to inlay, my favorite way to create leather closures, an interview with the Director of the Leather Research Laboratory, and then we'll talk wood... because we're reckless that way.

You can also find more information about leather in the April/May issue of Step by Step Wire or just jump right ahead to Tammy Honaman's fabulous leather cuff featured project... I even saw that they have kits for her design! If you are looking to learn in person, join me at the Bead and Button Show this June or at the November Autumn Artist Retreat here in WA at the Suncadia Resort. Two of my favorite wire artists will be there...Tracy Stanley and Sarah Thompson (I will be sneaking into those classrooms)! And then, of course, you can learn in the comfort of your own home with the book Beautiful Leather Jewelry or by viewing a Craftcast class!

And on a final note, my heartfelt thanks. For joining us here. For stopping by to say hi at the shows (and for bringing me coffee...you know who you are!!). For dropping me a message with a photo of what you are making. For leaving me comments just when I am sure no one wants to hear what I have to say. For sharing my excitement in the silliest of reckless things (remember the April Fools post a few years ago where I attempted to turn my flexshaft into a pottery wheel? Yep, still removing clay off the walls). For helping me realize this reckless dream! I know I'll have more to say on this later, but not on April Fools.

Create recklessly,

Melissa

Monday, February 9, 2015

Snap Bezels

Polymer clay snap bezels by Melissa Cable


I am home from the Tucson launch of Create Recklessly leather tools and supplies and I couldn't be more inspired...and tired!

After a busy day unpacking and catching up with my family, I finally had some quiet time to myself. I kicked up my feet and grabbed the most recent issue of Step By Step Wire magazine, which contained a polymer clay article I contributed. Then, I drifted off to sleep for a long needed nap. I found myself dreaming of setting snaps! Afterall, I must have demonstrated how to set a snap over 100 times last week. So, it should be no surprise, that when I woke I was convinced that a snap receiver (the female part) would make a perfect bezel for polymer clay.

And sometimes inspiration happens just like that. But, could the leather survive the toaster oven? Hmmmmm... Nap done, reckless creation about to commence...

I always start with the "proof of concept" phase, where I throw something together just enough to test if it works. Luckily, it did not go up in flames (literally and figuratively), the leather did not get hard, did not curl and the color did not fade...all things I suspected might happen.

Then it was time for some real tests. I made an entire bracelet and placed 6 other leather samples in the toaster oven. I wanted to test different types of leather (chrome tanned vs. vegetable tanned) and different colors of leather in case the dyes affected the outcome. I also kept an identical piece of each leather outside the toaster oven as a control.

The results were consistent. Every piece of leather shrunk in both length and width by 5% exactly. I had hypothesized that the vegetable tanned leather would shrink more, but it too shrunk by 5%.

Of course the most important thing with this technique is to use caution. The leather can catch fire if it comes in contact with the heat coils or is baked at high temperatures. Some leathers may be treated with different coatings or dyes that could react with heat differently than the Create Recklessly leathers. Be sure to do your own testing with the leather you are using and always supervise your toaster oven.

Give it a try...and be sure to share pictures...I would love to see YOUR snap bezels...maybe with some resin, concrete or epoxy?!?!


1. Preheat the toaster oven.

2. Pierce a hole in the leather using the 3/16" hole piercer.

3. Place the eyelet through the hole from the back of the leather.

4. Place the receiver over the eyelet.

5. Use the medium eyelet setter to set the eyelet inside the snap.

6. Roll conditioned polymer clay in a pea-sized ball and press into the snap receiver, removing clay as needed.

7. Use stamps to decorate the clay. I also used a gold Sharpie for dots.

8. Bake as directed (I chose a clay that would bake at 275 degrees for 15 minutes at the thickness I was using)

9. Apply any finishing techniques to the clay as desired (buffing, sealing, etc).


I better get to work developing a project with all these leftover snap pieces!

Create recklessly,

Melissa

PS - Look for our new online store at the end of this month, complete with a new store manager... former beadclub customers might recognize her!  ; )


Friday, May 23, 2014

Cheers to School Teachers!


 Leather coffee sleeve using Tierracast Rivetables
Melissa Cable

School is getting ready to wrap up and the fifth grade moms asked me to come up with a little thank you gift for our elementary school's teachers and staff. I have lots of scrap leather that I was happy to donate, but a bracelet proved tricky due to varying tastes, sizes and genders. I took a sip of my Starbucks as I was contemplating other projects (a leather wrapped-pen, book marks...) and then I noticed the cardboard sleeve on the cup. Bingo! Leather coffee sleeves!

Tierracast's new rivetables were perfect for adorning the sleeves, both functionally and aesthetically. It was an easy project and the other moms and I had fun making 45 of them over morning coffee. While these were simple, I envisioned how I could make customized sleeves...with engraved drawings from my children, colorful stitches, tooled patterns, handmade hardware. I can't wait to have the time to try!

Make sure to use a leather that has a finish on it or apply a sealant (so it can be easily wiped in case of drips). For this same reason, you may also want to apply edge coat to the exposed edges of the sleeve.

Tools and supplies:
Beadsmith leather hole punch (LP200) set to 2mm hole
Tierracast rivet setter (79-0103-00) and small steel block
Scissors or leather shears
Pen
3 Tierracast rivetable charms (Item 94-5797, 98, 99)
3 Tierracast cap rivets (Item 01-0060)
Starbucks coffee sleeve
Leather 2.5" X 10"*

1. Use the 2mm leather hole punch to pierce 3 holes on the coffee sleeve (centered on the glued seam of the sleeve)

2. Careful peel the seam apart. Place the sleeve on the back of a piece of leather and trace it, being sure to mark the holes.

3. Cut out the leather and use the 2mm leather hole punch to pierce the holes in the leather.

4. Place the peg part of the cap rivet from the back of the leather on the end that is notched. Place the hole on the other end of the leather over the peg, put the charm on the peg, and then place the cap over the peg, pushing down firmly. Repeat until all 3 charms are applied.

5. Place the back of the pegs on a steel block (the block will be sitting inside of the sleeve). Place the rivet setter on the rivet cap and strike it firmly with a weighted rawhide or other hammer.

6. Might I suggest a triple tall americano with that?

Create recklessly!

Melissa


*You can reduce size of sleeve to use just 2 charms with a 2" X 10" piece of leather.


Tuesday, May 13, 2014

Back, but Never Gone


Creating recklessly at home...almost done!

I have been on hiatus...not just from this blog but from from my normal day-to-day joy of making. Due to water damage resulting from a leaking refrigerator and improperly installed decks, we began repairs and remodel on our home in January. This meant that the entire contents of our first floor was packed into the kids room and studio while my family and dog moved downstairs for the last 4 months. Except for a piece I made for the Beadsmith Inspiration Squad and an article I wrote for Step by Step Wire...I have created nothing.

Beadsmith Inspiration Squad Project Using "O" beads inlayed into leather.

It has really bothered me the last few months that I could so easily step away from making things and teaching. Normally if I go a week without making something I go stir crazy. I get restless. But this time was different. I didn't miss it. At all. Am I burned out? Should I switch directions and do something else? Do I really like what I do as much as I thought? Questions and doubts filled my mind. Well, now that the remodel is done I have figure out why I didn't miss it. It is simply because that over the last four months my artistic medium has been our home. I have created recklessly with my home, designing a space for our family that is comfortable and functional.

Now we all know how uber-talented the dear Tracy Stanley is. Turns out, her husband Warren is just as talented! He served as our general contractor, and lets be honest, he knew how to handle every crazy idea I had and made them all come to fruition. Afterall, he lives with someone like me...someone who I suspect has to create to thrive. When I told him I was going to take a class in working with stainless steel so that I could make my own brackets for this crazy installation I wanted, he didn't even blink. I'll post on that project when the installation is done so you can see the journey from start to finish.

But now the remodel is nearly done, a little paint and stain and the upstairs interior is finished. With that part of my creative life nearly over, I notice I've been getting restless again. Luckily, the Bead and Button Show is just around the corner. I can't wait to teach lots of leather and Faux Bone classes and get back to making and teaching.

So here I am, I'm back. But really...I never left.

Create recklessly,

Melissa

PS - A quick shout out to another instructor stretching their creative wings! Linda Franzblau serves as the Marketing Manager for Kalmbach books and I have worked with her on my last two books: Metal Jewelry in Bloom and Beautiful Leather Jewelry. I was pleased to see she's stepping away from the desk and teaching some classes. Be sure to check them out!


Monday, April 7, 2014

A Create Recklessly Challenge: Now That's A Jig!


Did you get a chance to see the waxed string template trick for "Now That's A Jig!" in the Spring 2014 issue of Wirework magazine? We'd like to see what YOU do with this trick!

Be one of the first 50 people to sign up and we'll send you a small pack of waxed string to create recklessly with! Create your own template on any jig and email us a photo of your finished jewelry piece and a photo of your waxed string template. We'll post them here on the Create Recklessly blog for our readers to vote on their favorite. Didn't make it in time to become one of the first 50? No problem. Track down some waxed string at your local craft or party supply store and join the challenge.


The winner will receive the amazing "Now That's A Jig!" courtesy of the wire maestro, Brenda Schweder herself!!


Challenge Details

Deadline extended! 

How to Enter: To enter, create a template on any jig using waxed string and make a piece of jewelry (bracelet, necklace, or earrings). Email a photo (JPG) of the finished piece of jewelry and a photo of the waxed string template by December 15, 2014

Voting: Voting will take place between January 1, 2015 and January 15, 2015. Voters can vote for as many entries as they like, but they can only vote for each entry once.

Winner Selection: The winning piece of jewelry will be the one that has the most votes. Other winners may be selected at the blog owner’s discretion. Winners will be notified via email on February 1, 2015

Mail JPG photos to: melissa@melissacable.com

Rules:

  • One entry per person.
  • All submissions must be made from a template you made with waxed strings.
  • Winners will be chosen by the readers of Create Recklessly. All decisions of the blog owner shall be made at their sole and absolute discretion and will be final.
  • Create Recklessly readers can vote for as many entries as they like, but they can only vote for each entry once.
  • By entering, entrant is assuring beadclub LLC that their submission is an original design of the entrant and that the entrant has the right to submit it for use by Create Recklessly without the consent or approval of any third party. 
  • By entering, each entrant is granting beadclub LLC the perpetual and royalty-free right to use the photographs (without photo credits) and the name of the entrants and winners.
  • The contest is void where prohibited or restricted by law.

Sunday, November 24, 2013

Melissa's Coconut Butter Chocolate, Banana, Rum, Bacon Bark


 Melissa's Coconut Butter Chocolate,
Banana, Rum, Bacon Bark


I stumbled upon the recipe for Chocolate, Marshmallow, Whiskey, Caramel, Bacon Bark (pictured and linked below) and made it for my husband and his friends for their recent "guys night." I won't even begin to tell you how much sugar this recipe uses. But I will say, it was sticky, chocolaty heaven!


One of the guys, like me, had just finished his Whole 30 (no dairy, grains, sugar, alcohol, legumes for 30 days) and we joked about how we could make this Whole 30 compliant.

So of course, my mind mulled over this thought all day. And, although this is not compliant and I certainly wouldn't call it health food, it is dairy and processed-sugar free. But, there is rum hidden inside...and bacon...well, that's not so hidden. If you like frozen chocolate covered bananas, trust me, you'll love this!

8 oz. jar of coconut butter
2 Tbsp cocoa powder
1 medium overripe banana
3 Tbsp rum (Zaya is my favorite)
1/2 tsp vanilla
1/4 cup crispy crumbled bacon
8X8 pan lined with parchment paper

1. Place the coconut butter into the microwave, lid off, for 1 minute. Stir the jar so that the butter has even consistency. You can heat it again 15 seconds at a time, but if you overheat it you can burn the unstirred butter at the bottom.


2. Spoon out half of the coconut butter into a small dish and mix with 2 Tbsp of cocoa powder. Reheat as needed to get a smooth consistency.

3. Spread half of the chocolate mixture into the 8X8 dish and place in the freezer until firm.


4. Mash up the peeled banana with the back of a fork until smooth. Place it in a small saucepan over medium heat and cook until it turn light golden brown, stirring constantly. Remove from heat and stir in 3 Tbsp of rum and the vanilla. Stir in 1 Tbsp of coconut butter and reheat the entire mixture if needed to get an even and spreadable consistency.


5. Remove the chocolate from the freezer and spread the banana rum mixture over the chocolate. Return to the freezer until cooled. The banana mixture will become firmer but will not solidify completely.

6. Reheat the remaining chocolate mixture. Remove the pan from the freezer and spread the remaining chocolate mixture across the banana. Top with crumbled bacon, pressing it in lightly. Return to the freezer until chocolate is firm.


7. Remove from the pan, break into pieces and store in an airtight container the refrigerator.

Creating recklessly in the kitchen this week,

Melissa

PS - If you are in the Seattle area, join me up at the Ranch Center for Arts and Craft on December 14 at 10am for a class called "Get 'Er Done." Bring your unfinished projects or projects you've been meaning to start and I'll help you jump in, recklessly, and get 'er done! We'll cover lots of techniques and materials as we learn from the varying projects students bring. And...I'll bring some of the chocolate, banana, rum, bacon bark! Visit the Ranch's Facebook page for sign up information.

Monday, November 4, 2013

Leather Embellished Wood

Wood, Leather by Melissa Cable, 2013

Some of my favorite projects in my next book, Beautiful Leather Jewelry (Jan 2014), are leather embellished wood beads. There are capsule beads, spool beads and more. So when I saw a Facebook ad for wood plugs by WidgetCo I was both excited and horrified. Does Facebook know me THAT well...eek!

But, regardless, off to WidgetCo I went and ordered a variety of face grain wood plugs. I am always happy to feature a company that has great products and service and this company qualifies. The wood plugs were beautiful, the package came quickly and they even followed up with an email (promise this is not a paid endorsement, they don't even know I am writing this!) I included a copy of my order here to make it easier for you in case you decide to make one.

If you leave a comment below, I'll draw a name and send the winner some of my wood plug stash! Let me know if you've worked with wood and why or why not. I'd love to hear what you've been doing.


I'll admit, I was a cold connections snob. I did not count adhesives among quality connections. But a class with Bob Ebendorf changed that, thank goodness, because much of the work I do with leather and wood would be difficult if not impossible without adhesives....including this bracelet as it is made by drilling holes in the sides of the wood plugs and gluing them together with 2mm round leather cord. Here is a quick step-by-step on making this bracelet, with TWO types of glue...eek!

1. Mark the holes on the wood plugs. This is best accomplished using the tape covered circle template I described in my post "Finding Center." Remember that the interior plugs will have 4 holes, the exterior 3 holes and the corners only 2 holes.


Let me make the mistakes for you...be sure to mark your holes! I failed to do this with my piece, I jumped right in because I was anxious to try it! Next time, I will definitely be more precise.

2. Place the plugs in a small vice (this is my favorite ZONA vise). Be sure to put scrap wood below the plugs so you don't drill into your vise. Use a drill size that works with the leather you chose. I used 2mm leather and a 3/32" drill bit.


I painted the sides and back of each wood piece with a metallic bronze paint, which is optional. I also painted the leather cord in a light coat of the same paint.

3. Place a needle tip on a bottle of Zap A Gap. Work in vertical sections by connecting three plugs together at a time. Drop glue into the hole and slide a piece of leather into the hole. Hold for a moment to let it set. Be careful to use only 1 drop of glue...excess glue can and will ooze out of the other holes easily.


Trim the leather so that it is approximately 1/2" so that you have 1/4" between the wood and 1/4" to glue inside the adjacent plug (1/8" for inside smaller plugs). Keep glueing vertical sections of three together, making sure they end up the same height. When you are done with vertical sections, connect these sections together by gluing in leather cord horizontally between the holes.

4. Punch circles out of leather and place edge coat on the edges to both clean up the edges and frame the leather. Use Tandy Leather Weld to glue the leather discs on top of the wood as desired.


TIP: I remove the lid from the leather glue and leave a paintbrush inside. Early on, I put painters tape around it to keep it sealed, but now over time, it has created its own glue plug. While not attractive, it works well and I always have a brush for glue.


5. I spray sealed the entire piece with a shiny acrylic sealant, which really made the wood pop, and then on the center end plugs I inserted antique copper eye screws to attach the hook clasp.

This bracelet is amazingly strong (which is why I love and prefer Zap A Gap for my cyanoacrylate needs). I tried to pull two pieces apart and no matter how hard I tried, could not get them to separate. I had to trim the leather cord and drill into the leather when I accidentally left a piece of leather too long!

Thanks for stopping by and I hope you get a chance to Create Recklessly this week!

Melissa

PS: The winner of the Surface Texture Bible is....Angi Mullis!
Let us know how you like it Angi. : )


Friday, October 25, 2013

Inspiration from Inspiration: Now That's A Jig!

wax string template

The embossed/debossed leather I made yesterday has been rattling around in my brain. I am so inspired by its texture and now envision a collar made up of triangular pieces. The original inspiration of organic texture on a refined shape is asserting itself (see last blog). Little did Eva Sherman know her bracelet would spark such a creative flurry!

I decided to try and mimic the texture on the leather using wire... and when I think wire, I think Brenda Schweder's Now That's A Jig! I use this tool constantly in my workshop, but to be honest, most often I use it for things other than wire. The many threaded holes allow me to screw things down, anchor objects, bend sheet into neat corners...the list goes on and on. So I am always thrilled when I can go back and use it for its original purpose...wire!

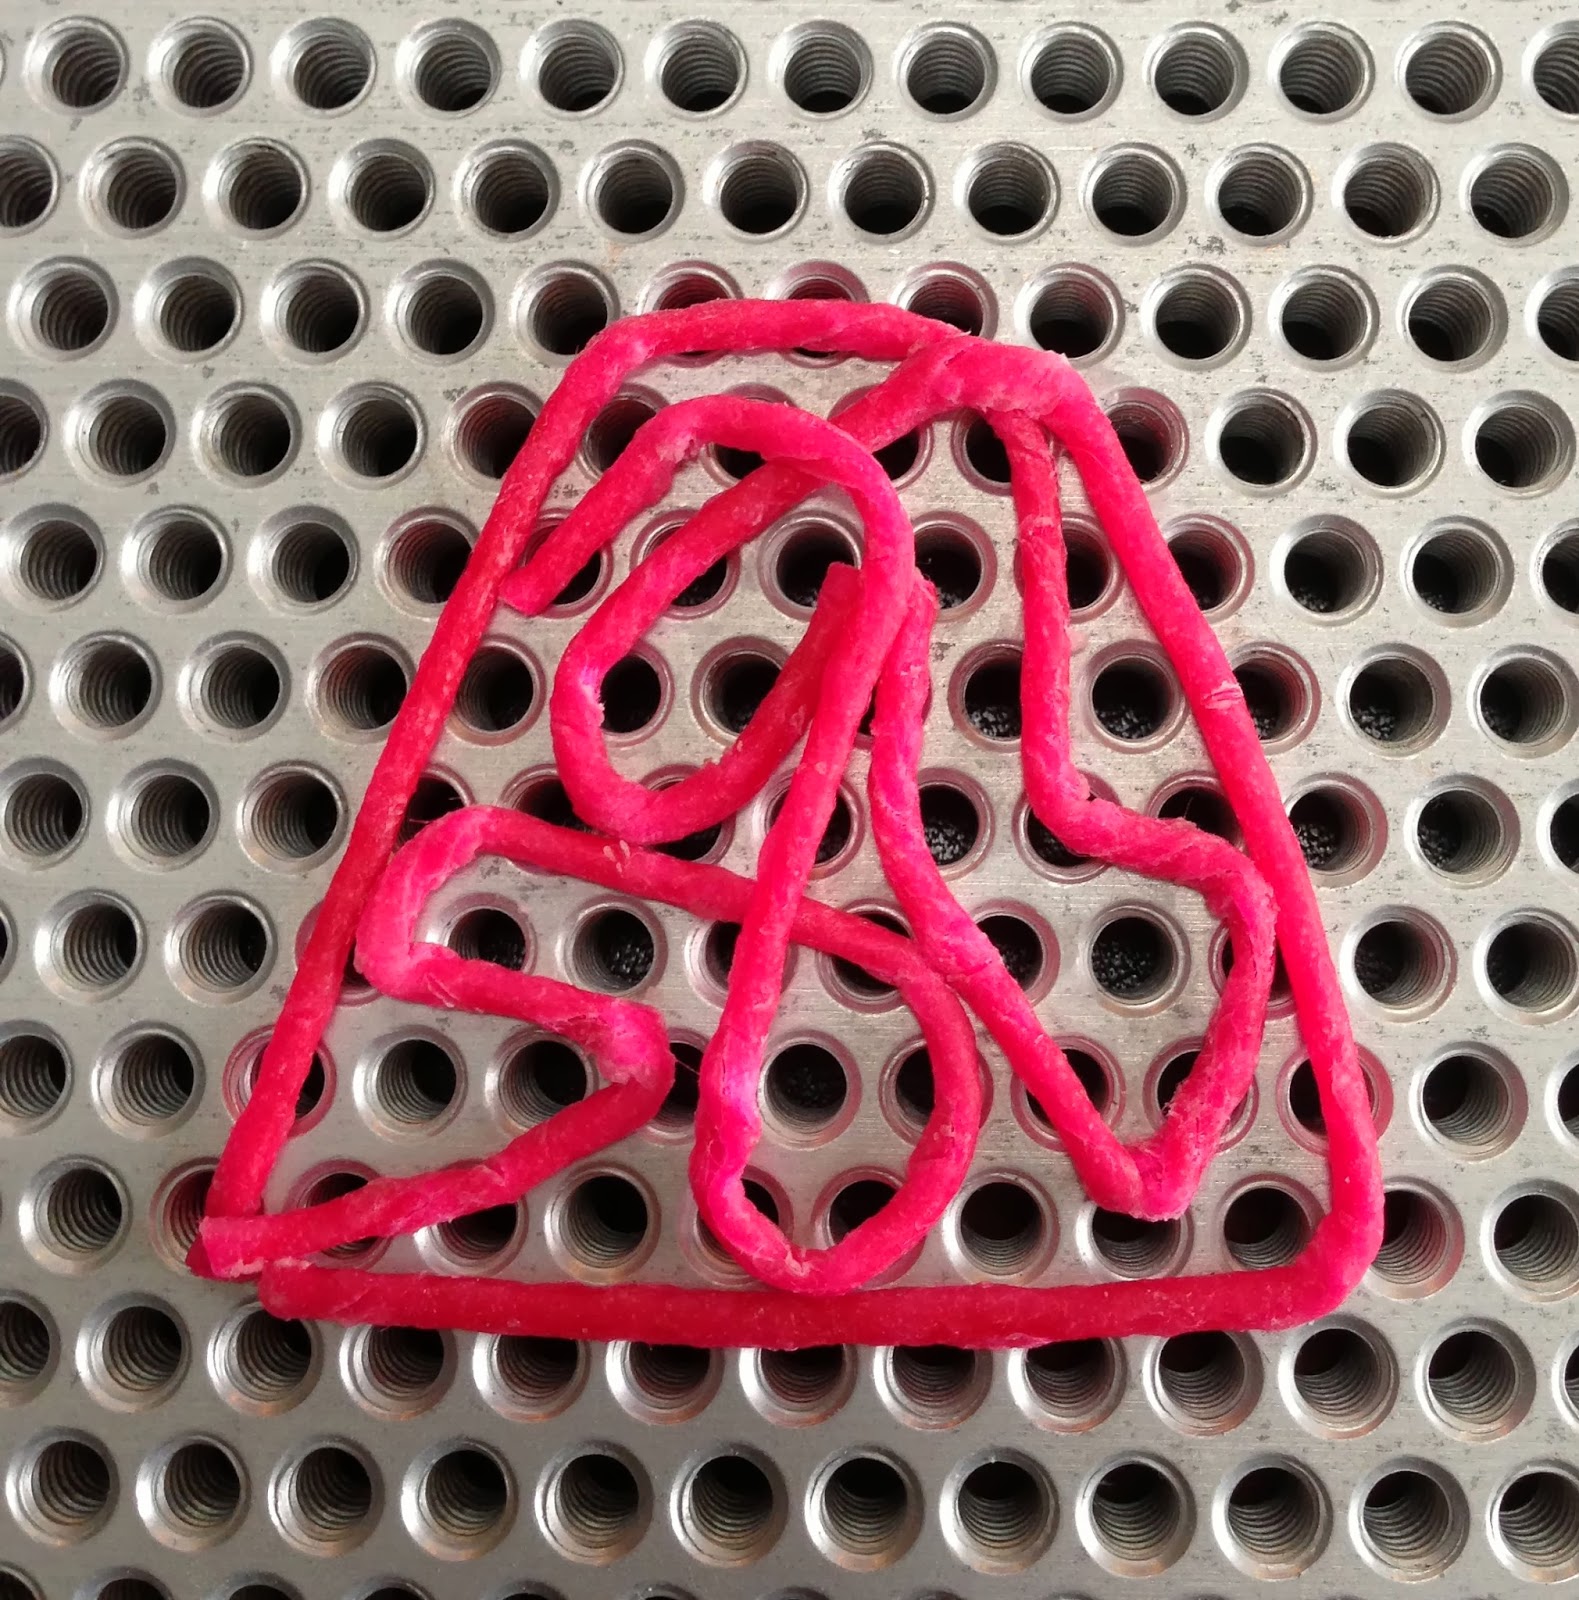
What I am really excited about sharing is that, because I had the wax covered string out from part I of this project, it occurred to me that these strings would make great templates on the jig! They stick nicely, won't damage the jig, and I know exactly how much wire to use because I know the length and quantity of the string I used.

The trick is to lay the strings down as if they are one long string, allowing you to have an unbroken path for your wire. I had to adjust my strings as the original path (below) was not an unbroken path.


Next, place peg at all of the turns. I used the 1/8" pegs but could have used some of the larger or smaller ones as needed. When I make the final version of these components, I may use the 1/4" in the corners.


TIP: If you get a post stuck did you know you can use the top of another post to help grasp it to twist it out?

I used 14 gauge wire. In the future, I will anneal it first. I used three 6" wax strings so I knew I needed at least 18" of wire...I cut about 24" to give me plenty of tail to anchor as I pulled on the wire. I started in one corner at the center of the wire and began to follow the path.


Once done, I pulled the wire off the pegs gently. When I am done with this project, my plan is to remove the pegs and then carefully transfer the wax sticks to a piece of paper for future use.


I then soldered the wire form in select areas and ran it through my rolling mill to flatten and apply texture. I need to practice refining the shape a bit more, but there is proof of concept here I believe. I traced the shape on the back of the leather and cut it out. Design wise, I am not fond of the difference in the "weight" of the two components and will likely experiment with soldering bezels for stones or other things onto the wire in order to beef it up.


Also, I mentioned in the last blog post that I was thinking of finishing the cut edges by pulling the leather up, cutting the string back and then gluing it flat. That worked beautifully.


Thanks again for stopping by. I'll be sure to post the final piece once I get all of the components made.

Create Recklessly!

Melissa

PS - Leave a comment below and I'll draw a name next week and send the winner a pack of waxed string to make their own templates! : ) Let me know if you shared the post on any of your social media and I'll enter your name twice. Shameless self-promotion, yes, but I've learned some great things from our readers! My favorite tip was where to get colored 2.5mm CZs....I use them constantly now! Thanks Georgette and Julie!


Thursday, October 24, 2013

Leather Embossing/Debossing


Embossed/Debossed Leather sample

Earlier this week Eva Sherman posted week #43 of her "Year of Jewelry Projects". I have been a big fan of watching these mostly fold-formed pieces being created throughout the year, but something about this one really inspired me. I loved the organic texture on the refined rectangle shapes.


I immediately envisioned creating an embossed leather version, probably because I had just finished proofing the galleys of my new leather jewelry book and was enjoying perusing the book The Surface Texture Bible. In fact, I bought two of these books at my local book clearance store, so leave a comment below and I'll draw a name and send the second copy out as a prize!

Leave a comment below and
you may win this book!

The first thing that came to mind was a project I did with my daughter's kindergarten class in which we laid down wax colored string (also known as Bendaroos or Bendy Sticks) onto a wood frame and then did paper maiche over them. I mulled over gluing down string or using hot glue, but the wax string method seemed the least messy, the most flexible and was a technique I was familiar with.

My poor kids. They are getting used to hearing, "Hey everyone, put on your shoes, we are running up to Michael's." So off we went, and although no longer carried at Michaels, the wax string was found at the adjacent party store.

A step-by-step of how I created the embossed/debossed leather (can't decide which it is technically) is below. I had intended to cut the leather into rectangles, paint them and connect them together in the same fashion as Eva's piece. However, I found that I am really drawn to this piece of leather and its texture and am going to sit it aside and play with its use in my brain for a while.

1. Lay the waxed string across the backside of a piece of 2-4 ounce vegetable tanned leather. Press firmly to keep the string in place.


2. Paint 1/4 of the leather and strings with a thin coat of leather glue, I prefer Tandy's Leather Weld. Lay a 1 ounce piece of leather over the strings, backside down, and use a wet paper towel to gently press the leather down, wetting it so it becomes flexible and defining the outlines of the string at the same time.

3. Use dapping punches, chasing tools or leather modeling tools to press the leather down into the recesses. You will need to go over the sections several times as the leather will keep pulling from its neighboring recesses as you stretch it. I found that pressing on both sides of the string helped stretch the leather evenly.


4. Glue and wet the next 1/4 section and repeat.


5. When I finally do a finished project, I will need to determine how I will deal with the cut edges. I will likely pull the leather up, trim the string and glue the leather back down flat. I'm also curious to see if the wax migrates to the surface of the leather and stains it. This will cause blemishes if I use a water-based dye or may prevent adhesion if I use an acrylic leather paint. I'll share the results when I get there!


I know I still owe you a post on how to create line art from paintings (see my last blog post). I recently took apart my etching tank for a good cleaning an once I get it back together I will get on it. It's a fun exercise and I look forward to sharing it.

Thanks for stopping by. Create Recklessly this weekend!

Melissa

PS - Stop by my daughter's new blog "Diary of a Cursed Brother" and see her new project. November is National Novel Writing Month and it is a great time to get writing!

Thursday, September 19, 2013

My Inspiration Comes From...


Untitled by Barbara Fox, acrylic on canvas


Last month I put everything aside to redecorate my daughter's bedroom. As I removed everything from her walls so that I could paint, I took down a painting that has been a part of her room since she was born. Before that, the painting hung in my retail shop, before that in my office, and before that in my living room. The 90's frame is enough to signal I've had it for a while. It was painted by my friend Barbara. With our Synchroblog topic this month of "My Inspiration Comes From..." it was the perfect time to introduce you to this driving force in both my personal and professional life.

At nearly any given time during my sophomore and junior years of college I had three jobs, including being an assistant to a woman named Barbara Fox. At that time Barbara was one of the longest survivors with her type of metastatic breast cancer. She had been diagnosed in her late 20s and was then in her 50s. Her team of physicians asked her to document her care, as they were curious what might be her secret to survival. That exercise lead her into writing an autobiography.

I have so many stories that I am having a hard time deciding where to start! So I will boil it down into one simple point...Barbara changed my life. Barbara was an extremely independent, confident, vibrant, professional woman. I will always remember her bright pink lipstick, bleached blonde hair and the twinkle in her blue eyes. Now, I know that sounds like such a cliche, but seriously, this woman had twinkle.

For well over a year, I would show up a few times a week, be handed a pile of yellow legal note pads filled with her crazy handwriting that only I could decipher, and enter it into her Macintosh computer. We'd spend the last hour of my time visiting. It was during this time that we really got to know each other and became friends and confidants.

About a year after I met her, her cancer returned. Over that year, more often than not when I arrived, she would say, "let's go on an adventure." I'd drive her up the Southern California coast through Malibu in her red convertible Mustang (again...seriously cliche...Malibu, Mustang...but trust me, this is an unembellished true story) and we'd stop for lunch where inevitably we would strike up a conversation with some stranger. In almost every situation, people went out of their way to give her their contact information, hoping to connect more with this charismatic woman.

She'd speak with anyone. For nearly an hour, she and Patrick Dempsey discussed the merit of green beans in the salad we were eating at her favorite restaurant. She chatted up the parking valets at Johnny Carson's house on the night of his last show, nearly scoring a secret way into his party until their bosses showed up. The employees at her favorite clothing store would hold clothes aside for her until they went on sale. And on Friday nights, she and her girlfriends would go skinny dipping in her pool. Barbara had had a double mastectomy, but she was always, by far, the most comfortable one in the pool.

When Barbara became too sick to go out on our adventures, I would show up and she would hand me an envelope with cash and have an assignment for me. They included going to a movie by myself, sitting down at a restaurant and having a meal by myself, or treating myself to a terribly ridiculous piece of clothing. She convinced me to go out and get a job at a newspaper, I was a journalism major afterall, what was I waiting for?

Part of who I am is because this woman demanded that I respect myself enough to be independent. I hang Barbara's painting in my daughter's room as a reminder to pass on Barbara's independence and love of life. And perhaps through this post, I am able to do so just a little more. 

On a final note, when Barbara passed away, her attorney called and said the unfinished book had been left to me. I struggled to finish it for a while, but I could never recreate her experiences or gain her expertise. But then it occurred to me that the true story wasn't how she lived with her disease, it was simply how she lived. So one day, I hope to write our story, one of a woman at the end of her life, and another at the start of hers. Maybe that day started today.

Create (and live a bit) recklessly today!

Melissa


PS - So, thanks for hearing me out today! Phew...a little more personal than I normally get and I find it curious how uncomfortable and uncertain that makes me feel. But, I'll return to jewelry in my next post when I show you how to use photoshop to turn your favorite painting into a black and white image that can be etched into texture plates...using Barbara's painting of course!

Please visit the other bloggers this month:

Thursday, September 5, 2013

Inlaying Wire into Wood

Wire inlay experiment #1, Melissa Cable
Brass, sterling silver and reclaimed wine barrel


I am completely enamored with Andrea William's work. Her inlaid beach stones have been haunting my brain. I love jewelry that makes me go "how did they do that!" I let it rattle around in my head for a while and find, almost always, it inspires me in some way. This exercise was born of that inspiration.

I have been playing with wood on and off this year and thought I'd take a stab at inlaying wire into wood. My kids are back in school so once again between the hours of 10am and 3pm I can get some uninterrupted work done.

1. I used a cross cut bur from my favorite bur assortment to carve out lines in the wood, which was a slat of reclaimed wine barrel from the Stikwood assortment I recently ordered. I tried the round, cylinder and flame burs but the cross cut seemed to work best for lines.


2. I flattened 16 gauge wire using a chasing hammer.


3. I inserted 1/8" brass brads (mini hobby nails) into a solderite block and flowed some solder onto each head.


4. I soldered the flattened wire on top of the brads.


5. I used a hammer to gently flatten the nails to harden them and then hammered the wire into the carved slots in the wood.

6. I used 240 grit sandpaper all the way down to 600 to sand the wires flat.

7. The silver dots were made by using a jewelers tap and die and turning 14g silver wire into screws that were inserted into smaller pre-drilled holes in the wood. They were cut short and then the tops hammered flat.

8. The stone is actually a leather compression rivet to fill a hole where I had unsuccessfully tried to inlay a 4mm bezel-set stone. I tried to countersink the bezel but did not leave enough wood for the nail that was soldered onto the back of the bezel.

9. I set an eyelet in the corner to hang it from a chain.

I learned a lot through this process. The wood I chose had a deep, pronounced grain and it cracked at the end of the small wire inlay. It was easily glued using wood glue but I know next time to choose a more compact wood or to stay further from the edges. I also wish I had used 14g wire for the inlay based on the size of the bur I used. While that would mean more sanding, it would have filled the carved lines better. I'm quite sure this is not the last time I'll play with this. One of the things I like best about Andrea's work is the fine lines...they are the perfect contrast to the heavy stones. I'll likely order a smaller cross cut bur and practice being more precise at carving so I can do some finer work. 

But first, it inspired me to spin this into another experiment... inlaying wire into leather. I plan to carve some leather and solder tube rivets onto wire and inlay it into the leather...good thing school has started!

Creating recklessly in a quiet house,

Melissa