 The assignment was to create a brooch using a glass taxidermy eye. I'll admit, the eye creeped me out, but I wasn't going to question Andy's method. As the class was called "Imaginative Captures," he was looking for us to find unique ways to set the glass eye in our piece. Of course, I had to set it in Faux Bone. In fact, Andy got so tired of me talking about Faux Bone that he compared me to Steve Martin's romaine lettuce skit on Saturday Night Live.
I wish I had taken a photo of the table at Danaca. Andy had no less that 50 samples spread across the table in varying degrees of completion. It was heaven. We got to touch and play with each one and examine how they worked, asking questions as we went. I was inspired by this lever (below) that he created using a bezel cup.
Volcano Set Pendulum
As you can see, I constructed my pendulum just a little differently by using what he calls a "volcano setting," which was the first thing he demonstrated in class. It works along the same lines as my Faux Bone Frame Flaring tool, so this type of setting came to mind immediately.
Faux Reticulation
Before I punched and flared the hole which would cradle the brass ball bearing, brass tubing, and silver bezel pendulum, I wanted to texture the metal. I began to anneal it with a torch so that I could run it through the rolling mill. I was using what Rio Grande calls a single clad silver filled sheet, meaning it is Sterling silver on one side, and brass on the other. To my surprise, the metal almost immediately "reticulated." Stunned, I stopped and thought about it, quickly realizing it made perfect sense. Silver melts at 1640 F while brass doesn't melt until 1710-1800+ F (depending on the alloy)*. That meant the silver had flowed on solid brass, creating what appeared to be reticulation wrinkles...or at least that's my best guess!
A little research reinforced I would be doing that again. Reticulation sheet (which can take some practice) costs $35 for a 3X3 sheet of 24g, while the single clad sheet only costs $13 for the same size! The only reason I used the sheet at all was that I had some left over from making the dahlia in my new book, Metal Jewelry in Bloom. When shaping/folding/rolling metal, it gives you the opportunity to see both silver and brass.
Wood Backing
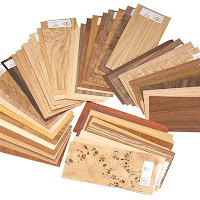
As I mentioned in the last post, I tried lots of different backing materials and eventually settled on a beautiful piece of wood. Well, I have to admit, while it looks like solid wood it is actually a piece of wood veneer backed by a piece of 1/16" Faux Bone. I had bought a pack of dozens of different veneers at Woodcraft after seeing jewelry made by Aaron Barr. He uses a lot of wood in his work, and I loved what the wood had to say in his pieces. So I tucked the pack away in my studio knowing that one day, I would pull it out...and I finally did. Aaron will be joining us as a guest blogger in the next week so he can tell you more about how he works with wood in his pieces.
The benefit of using the Faux Bone under the wood was that all of the tiny rivets on the front metal plate are actually wire tapped as screws and screwed into the Faux Bone. Only the four corners are rivets that go all the way through the silver bezel.
Survey says...ding! Romaine....err, Faux Bone was the answer! Sorry Andy.
Keep creating recklessly,
Melissa
*Melting temperature source linked here


You did a gorgeous job on this piece, Melissa—and you could never tell it was such a creative challenge?! Love that new reticulation technique too! *Ü*
ReplyDeleteVery cool! Sounds like it goes a lot faster than the traditional route along with being a lot less expensive. Thanks for the tip!
ReplyDeletebtw- love the pendulum and following eye...
I love your piece, Melissa. I didn't realize your reticulation was unintended. It looks great! I'm going to add that to my "to try" list. I did take a picture of Andy's sample table and will send it to you.
ReplyDelete