

Now That's A Jig with
wax string template
I decided to try and mimic the texture on the leather using wire... and when I think wire, I think Brenda Schweder's Now That's A Jig! I use this tool constantly in my workshop, but to be honest, most often I use it for things other than wire. The many threaded holes allow me to screw things down, anchor objects, bend sheet into neat corners...the list goes on and on. So I am always thrilled when I can go back and use it for its original purpose...wire!
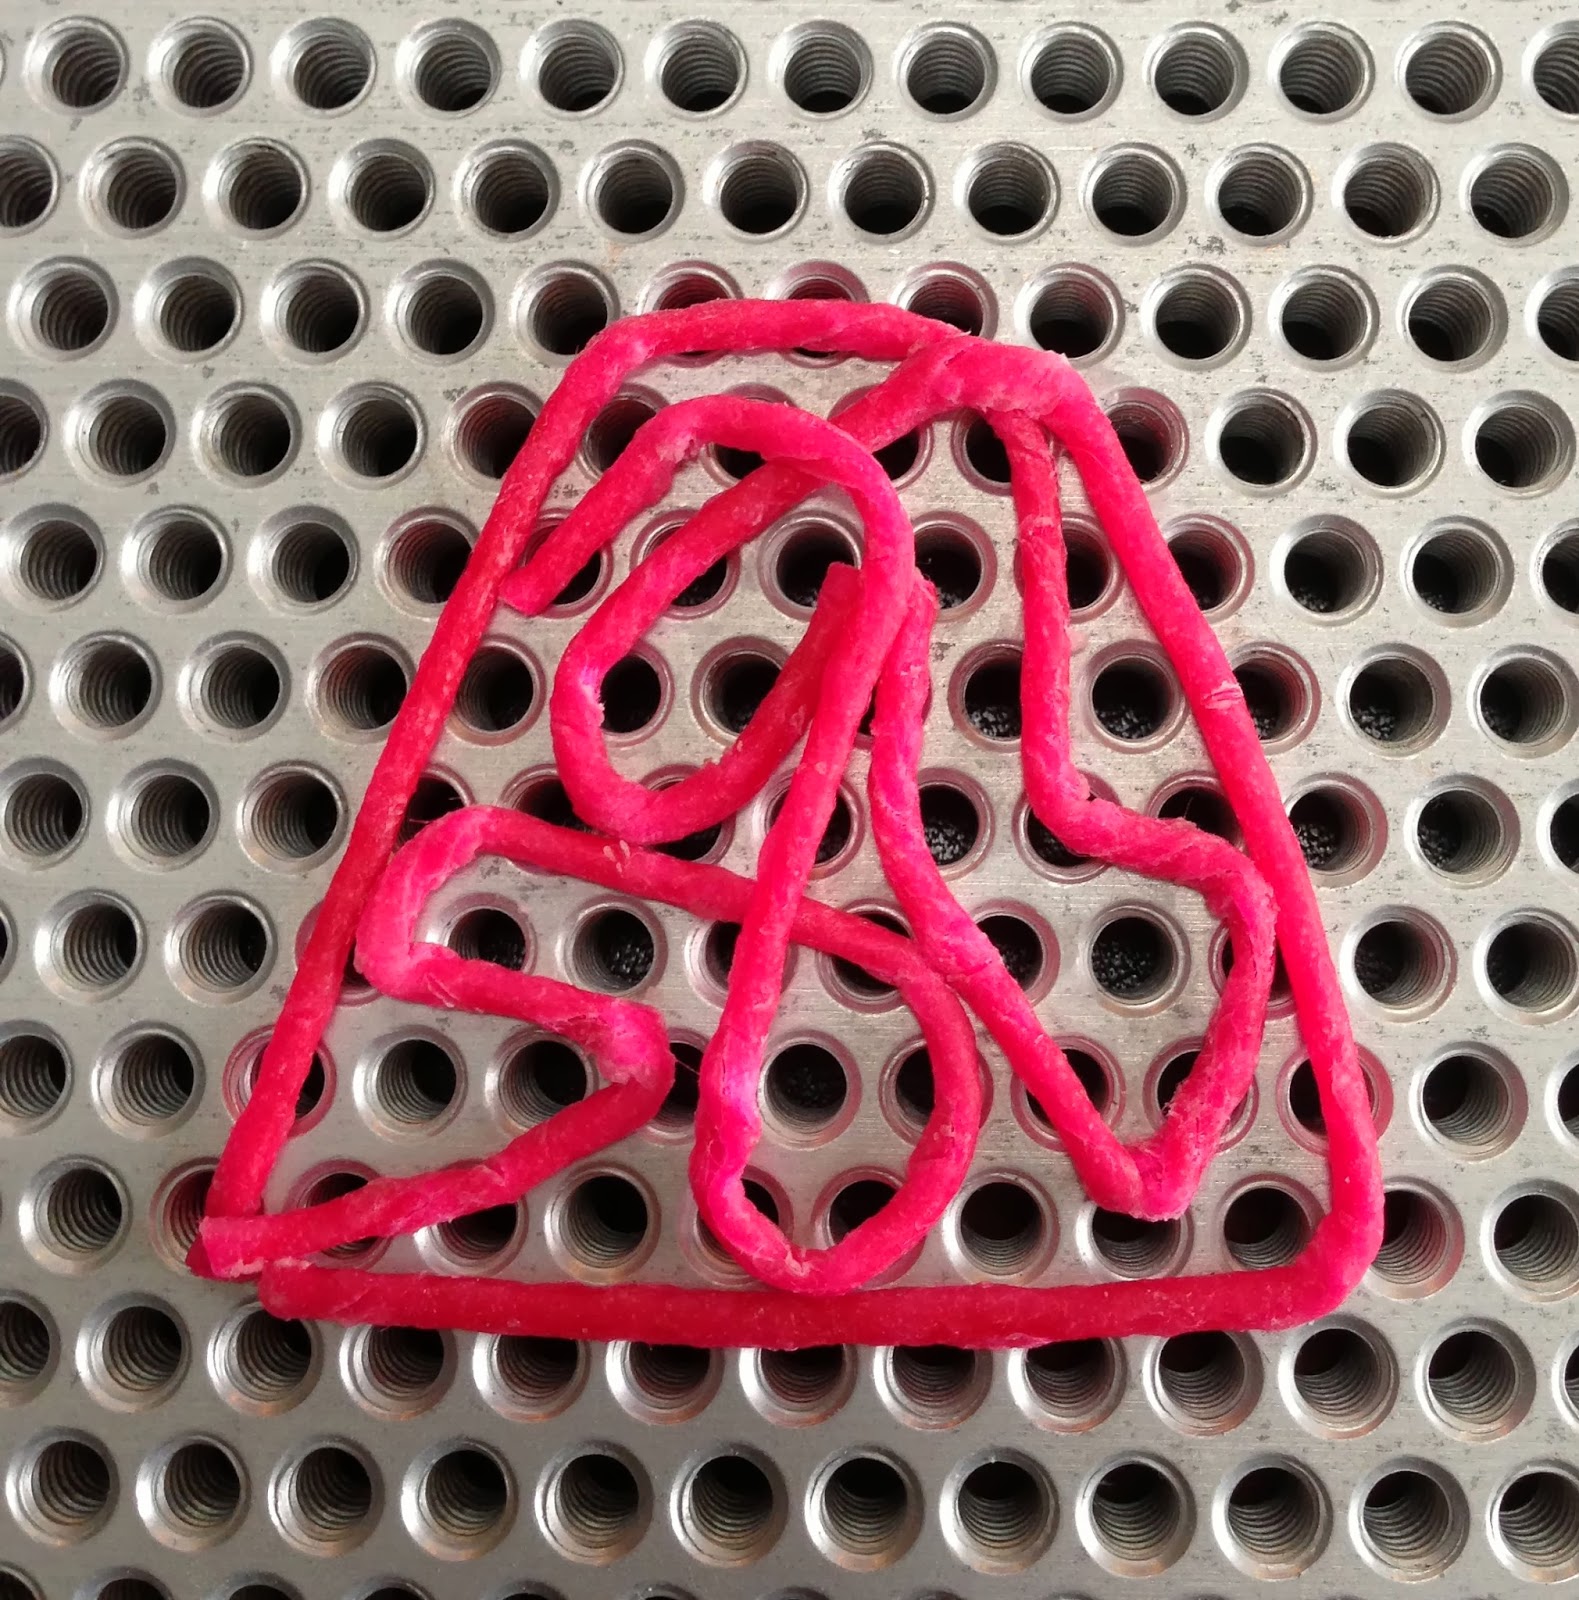
What I am really excited about sharing is that, because I had the wax covered string out from part I of this project, it occurred to me that these strings would make great templates on the jig! They stick nicely, won't damage the jig, and I know exactly how much wire to use because I know the length and quantity of the string I used.
The trick is to lay the strings down as if they are one long string, allowing you to have an unbroken path for your wire. I had to adjust my strings as the original path (below) was not an unbroken path.
Next, place peg at all of the turns. I used the 1/8" pegs but could have used some of the larger or smaller ones as needed. When I make the final version of these components, I may use the 1/4" in the corners.

TIP: If you get a post stuck did you know you can use the top of another post to help grasp it to twist it out?

I used 14 gauge wire. In the future, I will anneal it first. I used three 6" wax strings so I knew I needed at least 18" of wire...I cut about 24" to give me plenty of tail to anchor as I pulled on the wire. I started in one corner at the center of the wire and began to follow the path.


Create Recklessly!
Melissa
PS - Leave a comment below and I'll draw a name next week and send the winner a pack of waxed string to make their own templates! : ) Let me know if you shared the post on any of your social media and I'll enter your name twice. Shameless self-promotion, yes, but I've learned some great things from our readers! My favorite tip was where to get colored 2.5mm CZs....I use them constantly now! Thanks Georgette and Julie!

This is really neat. I am new to this and don't have the "Now That's A Jig" jig. I have a metal one and I think it's a Thing-a-ma-jig deluxe. Will these work on that? I am so confused.
ReplyDeleteThey absolutely will work! Congrats on jumping in! As you play more with jigs check out Brenda's. It is a heavy duty jig and really lets you get in there and work the wire and the variety of pegs is unbelievable and growing everyday! Thanks for stopping by! Email me your address at melissa@melissacable.com and I'll send you a pack of wax sticks just for being the first comment. : ) I'll draw another name next week.
DeleteI am also new to wire and have been a bit hesitant on trying a jig out. These ideas are amazing and makes me a bit more confident in trying one out. (I was so afraid to screw something up and end up wasting supplies!) I will be keeping an eye out on this page!!!!!! *motivation*
ReplyDeleteCongrats for jumping into wire work! Our giveaway link just posted, be sure to enter your name so you can receive some free waxed strings!
DeleteI love my jig too and find many uses for it. Your idea for using the waxed string to design patterns is genius! Thanks for sharing.
ReplyDeleteThanks! Can't live without our jigs! Our giveaway just posted, drop back by the blog and use the link to enter your address so we can send you some free waxed strings!
DeleteWow this is such a cool trick - would love to win this I am new to twisting wire and this is a cool idea. Thanks
ReplyDeleteGreat idea! I'm wondering if the wax string can be "stiffened" to permanently keep the shape? That way it could also be used as a focal piece too!
ReplyDeleteAs said previously, this kind of cable is particular to fit the necessities of a gadget. Organizations have made them to conform to any model, yet point by point for a correct fit.Top 10 best aux cables
ReplyDeletestud earrings is relatively simple. Regular cleaning with mild soap and water, or a jewelry cleaner suitable for the specific materials, diamond stud earrings helps to keep them looking their best.
ReplyDeleteMost branded watches for girls heritage of Pakistani craftsmanship, Gucci watch for women are adorned with intricate details that reflect the cultural diversity and artistic finesse of the region.
ReplyDeleteMaang tikka transcends bridal attire, gracing various festive occasions, celebrations, and cultural events with its timeless Matha Gold Tikka adorning the regal attire of a bride on her special day
ReplyDeleteLadies bracelet collection, where sophistication meets timeless charm. Crafted with meticulous attention to detail, steel bangle bracelet exudes a unique allure, seamlessly blending contemporary trends with classic aesthetics.
ReplyDeleteHistorically dating back to the seventeenth century, a cufflink (or cuff link) is a decorative fastener Cufflinks Pakistan the cuff on the sleeve of a tuxedo shirt, dress shirt, or womans blouse.
ReplyDeleteRngs feature an array of precious gemstones, including dazzling diamonds, vibrant sapphires moon ring captivating emeralds, meticulously set
ReplyDelete