Wednesday, November 14, 2012

Turning Faux Bone Beads with Flemming


My apologies for my long absence. I've been on the road teaching and meeting so many wonderful people. Something had to give. But now I'm back and am excited to feature some students in the next few blogs who share my same reckless spirit.

This September, I had the extreme pleasure of teaching at the Art Clay Festival held at Creative Glass just outside Zurich, Switzerland. My friend Robert Dancik, founder of Faux Bone, was scheduled to teach but unfortunately had to have last minute back surgery (he reports he is doing much better and is already back at his bench working on some new concrete kits he has planned for www.fauxbone.com in 2013). I was thrilled when he asked me to step in, and while I could never fill his shoes (clogs suit him way better than they suit me), I looked forward to the experience of teaching to a group which, in large part, spoke little English.

I could spend the next year blogging about this trip, the kind hospitality of Erna and Harry Sowersby, the unbelievable success of the well-planned and executed event, and the amazing people I met from all over Europe, including artists from the UK, Cyprus, Austria, Hungary, Germany, and Denmark among many other countries. I was pleased to walk away feeling like I created some new Faux Bone ambassadors as well as friends. I already have a collaborative project planned with metal clay artist extraordinaire Joy Funnell (but more on that later)!

Everytime I teach, I learn something: a new technique, something about myself or a new way to teach. On this trip, I was shown a clever trick by a lovely gentleman name Flemming Sorensen from Denmark. Clearly an accomplished jeweler, it was fascinating to watch how he approached working with Faux Bone. He spoke very little English, I speak no Dutch, but it really didn’t matter at all. I think we learned from each other quite well without any spoken words.

Flemming showed me how to turn Faux Bone beads. He cut a half inch square of ¼” thick sheet and drilled a hole in the center. He then mounted the square on a screw mandrel. He placed the mandrel on the flexshaft and, as it was spinning, used his metal file to slowly shape the piece. Depending on the angle and placement of the file, he created round beads, tube beads and oval beads, quickly and neatly. He used tiny tubes to separate the bangles he formed together in his stunning cuff (below).


He warned to watch that you don’t push too hard as you can bend the mandrel and risk pulling it from the flexshaft, flinging it across the room, but other than that precaution, it was an elegant solution. It reminded me very much of how Andy Cooperman works with a flexshaft (which I do believe I have raved about several times in this blog already). 

Thanks Flemming for agreeing to share your trick with us! 


Wednesday, July 11, 2012

Not So Brave

So long story short, er...as short as I can make it. I am driving down the road and a mouse comes up from the hood, looks at me through the windshield and retreats back under the hood. I, imagining he is going to come in through the gas pedal and crawl over my sandalled foot, pull over and jump out. My mother, who is following me in her car, pulls over.

The mouse pops back out in time for her to see it. Plan 1: make noises inside the car to scare it out...we hit the dashboard. Plan 2: open the hood. We can't figure out how because we both are basically too scared to stick our hands under the popped hood to find the latch. Plan 3. Lure him out with a spoonful of yogurt ( my breakfast while driving that morning). Plan 4: turn the car back on. That works!

The mouse leaps from the car near our feet. I run, screaming like a maniac. Mom reaches through the window and just keeps honking my horn to scare it, yelling "get back in the car and drive, now" over and over. During which time, the mouse is residing directly between her feet, unbeknownst to her. I am physically unable to speak, freaked out the mouse is going to crawl over her sandalled foot, and I just keep pointing, she keeps honking and yelling (my 4 year old is strapped in his seat yelling, "I want to see the mouse, why cant I see the mouse, I never get to see anything"...over and over).

The mouse, to escape the chaos, runs up the back tire into the rear of the car. I am now close to being late to pick my daughter up at camp. So, I hop in and drive down the road weaving, like I am trying to throw Bruce Willis from the hood of my car (this is twice in this blog I have aged myself by pretending Bruce Willis is still an action star) and then drive on the center line bumps trying to shake him out.

Long story short, don't know where the mouse is and now I have yogurt streaks across my window. Yep, forgot about the yogurt and turned on the windshield wipers. Ironically, we were returning home after seeing Brave.

Saturday, July 7, 2012

How to Make Jewelry Using a Broken Sonicare

I've had this bottle of Lisa Pavelka's Magic-Glos UV resin and wanted to try it as a coating over my fabric covered cabochons that I use in the new frame flaring tool. However, living in Seattle, inevitably it would be raining outside on the day I wanted to use it, and therefore I could not set it outdoors to cure (ironically, as I write this, it is a beautiful, sunny day).

Our Sonicare broke a few weeks ago and was sitting on the counter waiting for us to figure out how to dispose of it when I realized that it has a UV light in it. The Sonicare has a 10 minute UV brush cleaning cycle, coincidentally, the same amount of time it takes to cure the resin. My "create recklessly mode" clicked on and off I went to see...can I cure UV resin with a Sonicare?

Well you can indeed! I simply removed the molded plastic tray from the door, lined it with foil and laid it flat on the table. Although it was awkward to close as I was using the whole body of the unit as the door since I wanted the door itself to lay flat (allowing the resin to stay level), in 10 minutes I had cured resin.

A UV lamp made for such resins is not too expensive, generally under $30, but what's the fun in that!


I can't imagine a scenario that this would have any safety precautions, but it certainly is not used as intended by the manufacturer, so try it at your own risk. : )

Friday, June 22, 2012

Metal Jewelry in Bloom

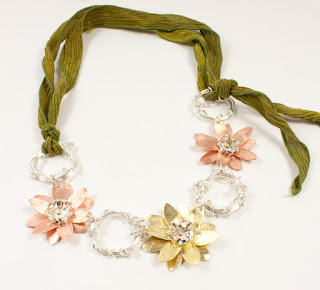
I just sent off my first batch of finished jewelry for my next book, Metal Jewelry in Bloom! I'm very excited to see all of the flowers that have been sitting around my studio finally come together into finished pieces. Thought you might like a sneak peak. The photo quality is horrible, I apologize. I managed to snap some quick shots before rushing out to Fedex.

Rushing being the operative word here. Last Fedex pickup was at 5:30 and I finished packing everything up at 4:30. The Problem was that Robert Dancik's Craftcast class on hinges started at 5 and I really wanted to tune in. So what's a girl to do but turn her phone into a hotspot and bring along her laptop for the ride. (Of course, just to listen!) I love technology. This time.


Thursday, May 24, 2012

Faux Bone Yarn

The beauty of the 2mm Faux Bone strip is that you can make it into a cylindrical rod. I use this shape to make organic, wound beads or to crochet a quick cuff (a future blog entry). While you can simply use the Faux Bone shaping tool to round the edges and then sand it into a round shape, my favorite way is inspired by techniques I learned at Danaca Design.

Several times during a class with Andy Cooperman, he put the piece we were working on in the flexshaft handpiece rather than the bit, bur or brush. I had seen this only once before during a toolmaking class with Bill Dawson, who had us remove our flexshaft handpiece, place our tool steel in it, and shape the steel on the grinder. This allowed the piece to spin freely and perfectly centered. I didn't realize it at the time, but these two classes have dramatically changed the way I work and how I use my flexshaft.

Now, when I want to create a perfectly round piece of Faux Bone (that because of its texture and size reminds me of yarn) I place one end of a 2mm strip in my flexshaft handle and the other side in a cordless drill. I stretch it taut, turn the drill on low, and the strip spins. Then, I run it along my running belt sander to quickly create a cylindrical rod.


I guess you can call it a faux lathe. Hmmm, I own a lathe, I wonder if....


You can see more of Andy Cooperman's flexshaft tips in his series of articles in Art Jewelry magazine and be sure to check out the Summer class schedule at Danaca Design, being released soon. I am absolutely thrilled to be teaching a class with one of the most talented (and absolutely nicest) artists and teachers I know, Nancy Megan Corwin. She will be teaching students how to use Faux Bone with the hydraulic press and I'll be helping students incorporate their Faux Bone dies into their finished pieces of jewelry. Join us!

Thursday, March 29, 2012

Snowballs Make Good Snowmen


You know the saying “it snowballed?” That saying comes into play in my life often. One example is with the recent Art Jewelry hardware store jewelry call for entry. I always love a good challenge, so my 7-year-old daughter and I went to my local Ace hardware and picked out items I could envision incorporating into jewelry. She carefully recorded all the counts and costs onto the plastic bag in the hardware section (and really deserves a shout out for her patience as mom entered her creative zombie state).

Among the items we picked up were nylon spacers. I had just finished testing fabric dyes on Faux Bone (see previous blog) and was curious as to how they would perform on nylon. The acid dyes worked so well that I immediately ran out and bought more colors and start dying batch after batch. I made a few bracelets for the call for entry, settling on one (above), made one for my friend Kristi's blog hop (see previous blog), and then stumbled upon a necklace design I fell in love with (left - soon to be in the hands of it's new owner Lisa D). From this, I created my first jewelry line to sell, a goal I had wanted to set for myself this year but, frankly, didn't think I'd accomplish! 

So those snowballs...well, they stacked up to be a pretty good snowman! Thanks Art Jewelry for pushing me down the hill.

Be sure to check out the online Art Jewelry hardware store jewelry gallery. There are some AMAZING pieces...and check back soon for more photos of my new Rhythm series of jewelry.

Friday, March 2, 2012

To Everything Turn, Turn, Turn

So, as you may have read in my last blog...last week was a disaster as far as real work getting done. But I DID turn a dradle, or a top, er, something that resembles one of those things.

It started out two weeks ago when I made a necklace out of a nylon sink part to submit to an Art Jewelry call for submission for harware store jewelry (the piece didn't get accepted, but another did! Thanks folks! Look for their online gallery in the coming month).  It had holes in it, so I filled the holes with wool (after dying the nylon piece brown) and felted it before adding some other embellishments. I've been wearing it ever since. It has become one of my favorite new designs. Then I got the itch to make it in other materials. So off to Woodcraft in downtown Seattle. Surely, I could make these out of wood. While there I picked out some beautiful wood and learned the best way to make spheres was on a lathe. I was referred to an instructor who I called immediately.


Mr Jack Wayne was happy to help and we set up a time for a class. Turns out his first project ever was a sphere, so this told me it was meant to be. Often times when I am learning a new skill, I learn just as much about teaching as I do the skill. This was one of those cases.

I was struggling to turn a round form, not giving up, but struggling. It is all about holding the tool at the right angle and I just couldn't get it. Poor guy kept having to resharpen his tools, which I am sure was because I was holding them wrong. I kept thinking it must be like giving someone who has never driven a manual transmission keys to your sports car. It was clear he valued his tools and took good care of them. But he didn't say a word...in fact he even taught me how to resharpen tools (I suspect because he knew I'd be doing a lot of that!)

He was very patient and just kept reloading new pieces of wood on the lathe, gently repositioning my tool and reminding me not to be scared of the loud noises they'd make now and again when I turned at too harsh of an angle.

Then he suggested I try a different tool and BAM...I got it. It reminded me that, as a teacher, sometimes we need to teach students not in the way WE want them do it, but the way THEY need to do it.

Sadly, I forgot to take my last, slightly oval bead off the lathe, but here are my first tries (the two on the right)...and his (the two on the left). He made that sphere in under 2 minutes. He made the top from my most miserable bead. That took him 1 minute.

But with a new rusty old lathe bought from an estate sale (complete with tools)...I am on my way to making a bead!


Monday, February 27, 2012

If You Give a Mouse A Cookie...

So last week, my family went skiing without me so I could focus on finishing my next book. Sounds like a good idea. Quiet time. Just me, my dog, my computer and my bench. But, no, not so much...

I admit it. Melissa does not do well alone. I am a pack animal (beyond just a pack rat). It's probably one of the reasons I like to teach. Being around other people invigorates and inspires me. Being alone makes me anxious, lonely, uninspired and scattered. Case in point....during my "work" week I:


  • Hired a dog trainer (apparently, he is more of a people trainer). Bought 6 hardware filled bags I'm to throw on the ground while growling to get my dog's attention.
  • Went out to buy a chicken to make soup for my sore throat 
  • While out decided to go to Hardwick's Harware downtown
  • While downtown, visited a friend to help her fix a database for the Seattle Metals Guild
  • When home, tested a new online database service to consider replacing the database all together. 
  • Facebooked the guild webmaster about said online service and looked at her recommendation
  • Typed up the sign up sheet for a guild collaborative show. Sent it to my friend Cynthia, known for her polymer and felting work.
  • Bought acrylic spheres from Tap Plastics. Intend to drill holes and felt in them.
  • Found wood blocks at Woodcraft envisioning the same project in wood
  • Visited an estate sale and bought a wood lathe, dust collector and pointed drill bits for acrylic 
  • Called a wood turner and convinced him to give me a private lesson on turning wood beads on the lathe
  • Took said private wood turning lesson with Jack Wayne
  • Wrote three blogs to save for future use (this one was written on Sat, Feb 25)
  • Took the nylon line out of my weed wacker - inspired by Mary Donald's and Flora Book's work with nylon monofilament. Liked it, but it was too thick, so...
  • Bought nylon monofilament
  • Picked up basic supplies for a high school class I agreed to teach at the last minute. Also found cool wood boxes.
  • Taught 60 high school kids how to use Faux Bone 
  • Texted all friends who were high school art teachers and asked them how in the *bleep* did they do it.
  • Designed new packaging with the cool wood boxes for all those finished nylon jewelry pieces I am going to sell
  • Bought another chicken (the one from 3 days prior was left in my car for 5 hours, see above). Made a big pot of chicken noodle soup. Forgot about it while I was doing an encaustic painting, packaged 3 containers full of noodles with gravy
  • Taught my local Thai food restaurant (Bai Tong) how to make Chang Mai noodles from another dish they had on the menu - because who wants soggy noodles with gravy.


Wow! I'm feeling good about myself. I got a lot done this week!

You can see why my husband says that If You Give a Mouse a Cookie is my life manual.

Saturday, February 25, 2012

To Do or Dye


I've been playing with dyes lately in my attempt to create rich, permanent, dark color on Faux Bone. Prior to this, I've had great luck with a product called Krylon Fusion spray paint, a solvent type of paint for plastic, but you have to let it cure for a full 7 days. Representatives from Krylon assure me that after 7 days it is completely inert, meaning we can heat the Faux Bone as usual. Now really, we all know that I am not that patient! So I, of course, stuck it in my toaster oven after 6 hours and found the paint got goopy and stuck to the pan. Not so after 7 days...but again, I am incapable of waiting that long.

So, it was to do or dye...I would find a quick way to make black Faux Bone. Below are my findings in regards to fabric dyes and Faux Bone, with the caveat that there is much more testing to be done. But, perhaps, you'll be inspired and we can share what we learn together.

Faux Bone, being a type of non-porous PVC product does not respond well to most dyes. Standard fabric dies, including acid dyes, meant for natural fibers (aka protein based fibers), may lightly tint it, but more often than not, the dye will simply wash off with soap and water. Instead, polyester dyes need to be used. Polyester can be dyed using a dispersion dye, meaning the dye has an agent added to it that allows it to "penetrate" the polyester (in our case, the polyvinyl chloride aka PVC). Most dispersion dyes can be highly toxic due to the additive and often require really high temperatures.

However, there is a new product on the market that I found worked well. Jacquard's iDye Poly dyes, commonly found in art supply stores, dyes Faux Bone exceptionally well. Retailing for around $3.99 it is an inexpensive way to get deep colors on Faux Bone. Eight colors are available and I found that the black, brown, blue, red and purple worked the best. Be sure to mix the entire packet. I tried to save the additive in a little plastic cup so I could mix a little at a time and the additive ate through the cup! What a mess.

I repurposed a double boiler so that the Faux Bone was never in contact with the bottom of the pan. If I kept the water at a very low simmer, the Faux Bone did not soften enough to change shape, meaning I could make one of my strip beads and dye it aferwards. Fast simmers and boiling water softened Faux Bone just enough so that any shape I had created before had distorted a bit. This makes sense. Water boils at 212 degrees F, which is just about the temperature Faux Bone starts to soften and become malleable. It can dye fast, so stir and check it often. Overlapping pieces will not dye evenly. Also, obvious to most but apparently not to me, don't put it in mason jars on a hot plate unless you want the glass to crack and permanently dye your tool bench blue... your favorite shirt, and skirt, and shoe, and sock...and foot for that matter. But a small price to pay to create recklessly!

The downside to this dye is that the colors do not mix well. If you are used to mixing paint or inks, you'll be disappointed. You may mix a color that looks like a sage green, and the actual color the piece dyes is fushcia. You may add a little black to yellow, maintaining the yellow look of the dye, and the piece will come out black. There's no rhyme or reason to how the colors mix.

I will continue to look for different types of dispersion dyes (already have a few on order) that allow me more flexibility in mixing colors or offer a wider variety of colors...will let you know what I find! But for a good solid black, which has been my goal, this product gets the job done.

Saturday, February 4, 2012

Kristi's Copper Component Blog Hop Reveal

I can't resist Kristi's components. One of her sea urchin copper pendants has been sitting on my desk for quite some time waiting patiently for its turn. When I saw the matching component as part of her blog hop, I knew now was the time!


My newest round of Create Recklessly projects has been experimenting with dyes. I love to work with Faux Bone and other plastics, and up to this point have colored them mostly using alcohol inks. But I longed for deep, rich, durable color. After much trial and error, I have come upon some great dying techniques. Accidentally during these tests, I stumbled upon some glass fiber-reinforced nylon. When dyed, it almost looks like glass. Because it is slightly transparent, it almost glows in the daylight. Yet, it can be sawed and drilled just like metal. I think I am in love.

So, I chose this material for Kristi's piece. I wanted to pick up the colors of the beautiful patina on the copper. The entire piece is constructed by threading wire as screws using a tap and die. This includes the "dotted" beads, which each have 28 pieces of wire screwed into them and then rounded with a cup burr. No matter how hard I try, I can't get the color right in the photo...the pieces are a deep lavender and the round hanging spacers are fuschia.

These nylon pieces are a new staple on my bench and I can't wait to play with them some more.

Be sure to check out the amazing designs using Kristi's copper components!


Kristi Bowman Design  http://dreamsomedesigns.blogspot.com/
Melissa Cable http://createrecklessly.blogspot.com/ - YOU ARE HERE