Friday, October 25, 2013

Inspiration from Inspiration: Now That's A Jig!

wax string template

The embossed/debossed leather I made yesterday has been rattling around in my brain. I am so inspired by its texture and now envision a collar made up of triangular pieces. The original inspiration of organic texture on a refined shape is asserting itself (see last blog). Little did Eva Sherman know her bracelet would spark such a creative flurry!

I decided to try and mimic the texture on the leather using wire... and when I think wire, I think Brenda Schweder's Now That's A Jig! I use this tool constantly in my workshop, but to be honest, most often I use it for things other than wire. The many threaded holes allow me to screw things down, anchor objects, bend sheet into neat corners...the list goes on and on. So I am always thrilled when I can go back and use it for its original purpose...wire!

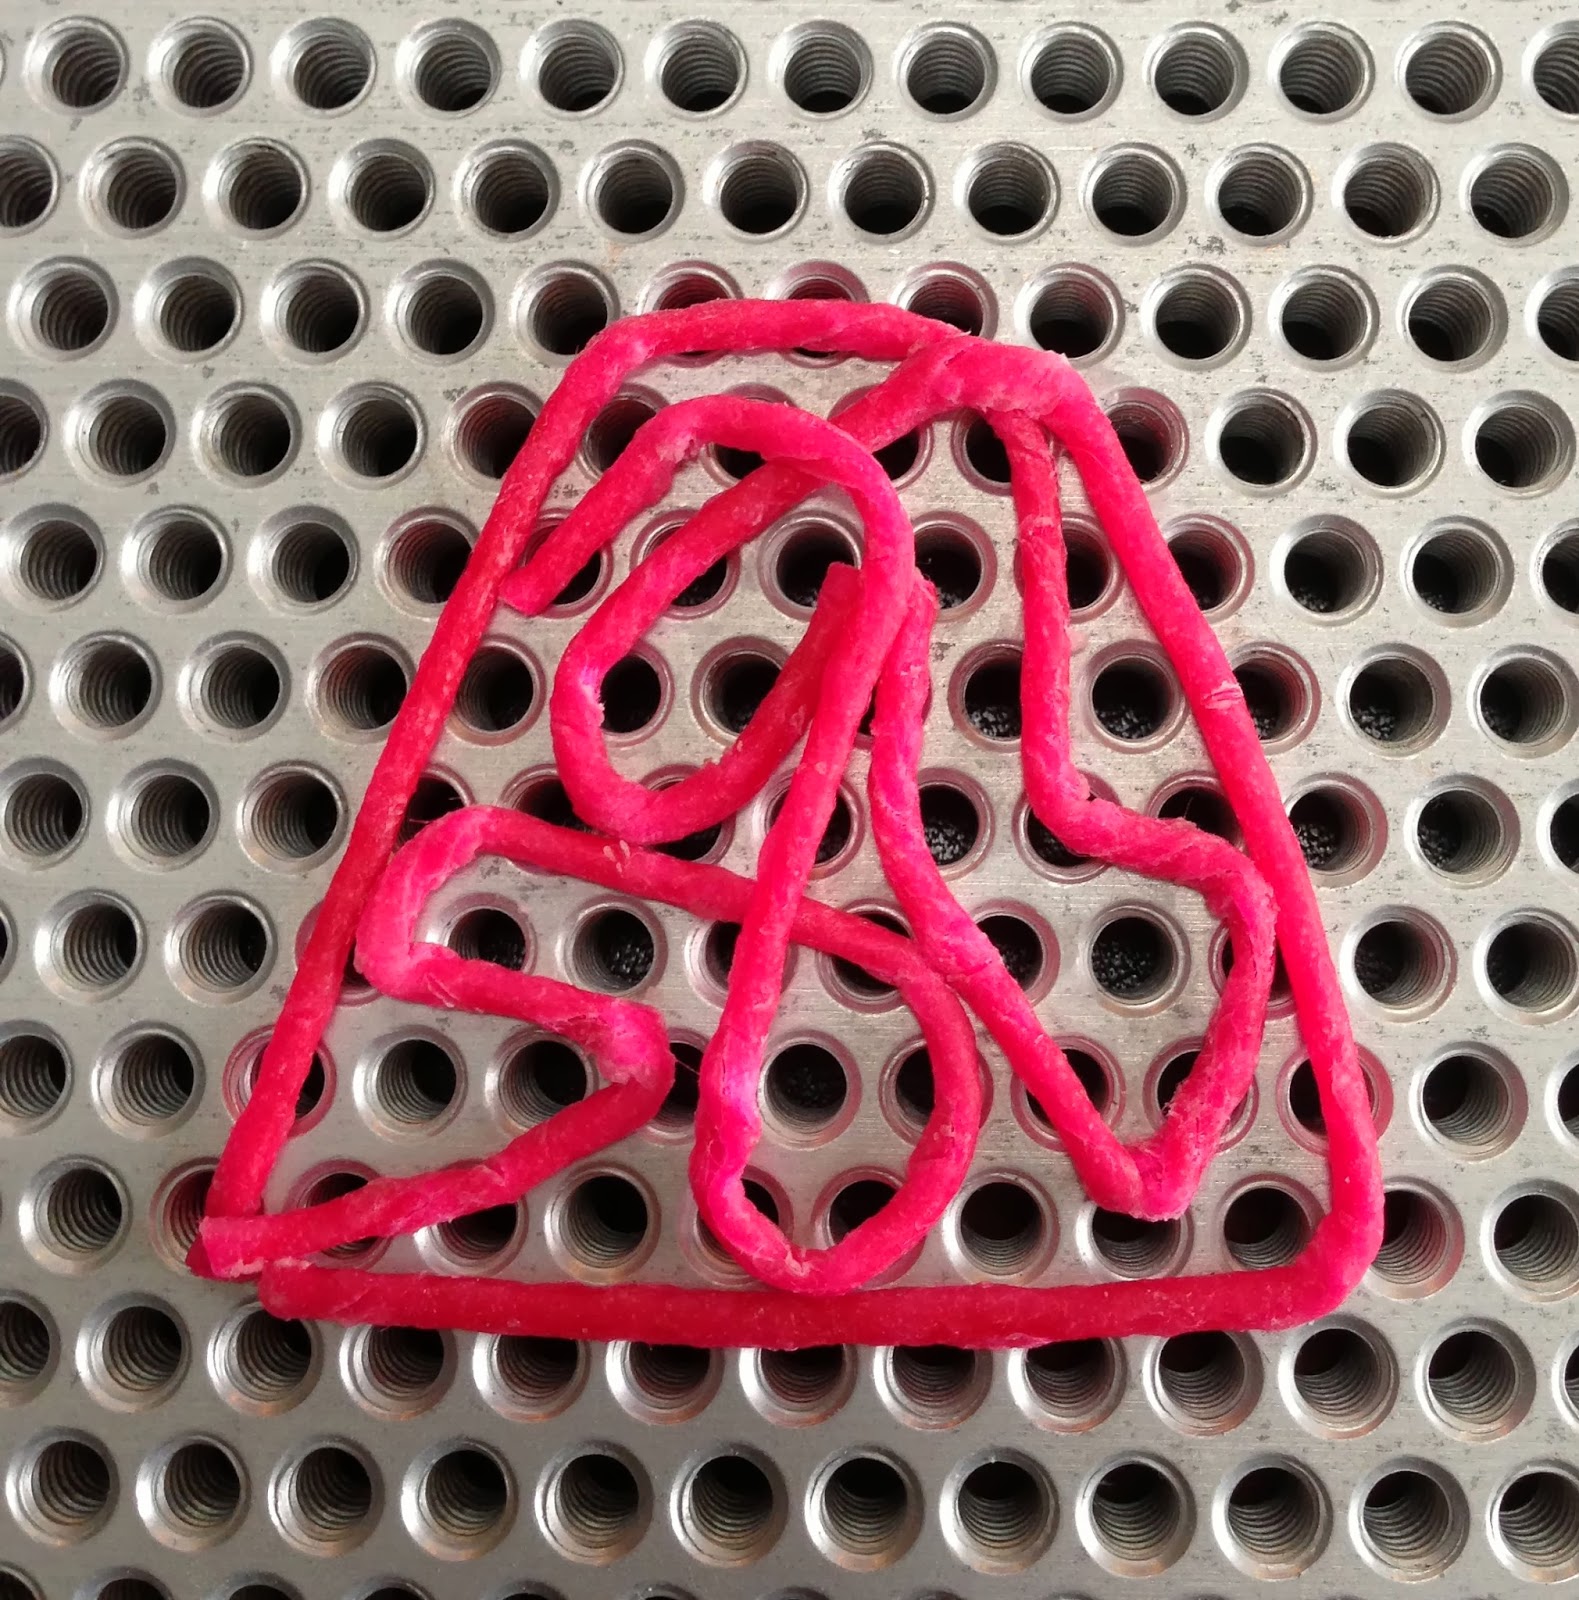
What I am really excited about sharing is that, because I had the wax covered string out from part I of this project, it occurred to me that these strings would make great templates on the jig! They stick nicely, won't damage the jig, and I know exactly how much wire to use because I know the length and quantity of the string I used.

The trick is to lay the strings down as if they are one long string, allowing you to have an unbroken path for your wire. I had to adjust my strings as the original path (below) was not an unbroken path.


Next, place peg at all of the turns. I used the 1/8" pegs but could have used some of the larger or smaller ones as needed. When I make the final version of these components, I may use the 1/4" in the corners.


TIP: If you get a post stuck did you know you can use the top of another post to help grasp it to twist it out?

I used 14 gauge wire. In the future, I will anneal it first. I used three 6" wax strings so I knew I needed at least 18" of wire...I cut about 24" to give me plenty of tail to anchor as I pulled on the wire. I started in one corner at the center of the wire and began to follow the path.


Once done, I pulled the wire off the pegs gently. When I am done with this project, my plan is to remove the pegs and then carefully transfer the wax sticks to a piece of paper for future use.


I then soldered the wire form in select areas and ran it through my rolling mill to flatten and apply texture. I need to practice refining the shape a bit more, but there is proof of concept here I believe. I traced the shape on the back of the leather and cut it out. Design wise, I am not fond of the difference in the "weight" of the two components and will likely experiment with soldering bezels for stones or other things onto the wire in order to beef it up.


Also, I mentioned in the last blog post that I was thinking of finishing the cut edges by pulling the leather up, cutting the string back and then gluing it flat. That worked beautifully.


Thanks again for stopping by. I'll be sure to post the final piece once I get all of the components made.

Create Recklessly!

Melissa

PS - Leave a comment below and I'll draw a name next week and send the winner a pack of waxed string to make their own templates! : ) Let me know if you shared the post on any of your social media and I'll enter your name twice. Shameless self-promotion, yes, but I've learned some great things from our readers! My favorite tip was where to get colored 2.5mm CZs....I use them constantly now! Thanks Georgette and Julie!


Thursday, October 24, 2013

Leather Embossing/Debossing


Embossed/Debossed Leather sample

Earlier this week Eva Sherman posted week #43 of her "Year of Jewelry Projects". I have been a big fan of watching these mostly fold-formed pieces being created throughout the year, but something about this one really inspired me. I loved the organic texture on the refined rectangle shapes.


I immediately envisioned creating an embossed leather version, probably because I had just finished proofing the galleys of my new leather jewelry book and was enjoying perusing the book The Surface Texture Bible. In fact, I bought two of these books at my local book clearance store, so leave a comment below and I'll draw a name and send the second copy out as a prize!

Leave a comment below and
you may win this book!

The first thing that came to mind was a project I did with my daughter's kindergarten class in which we laid down wax colored string (also known as Bendaroos or Bendy Sticks) onto a wood frame and then did paper maiche over them. I mulled over gluing down string or using hot glue, but the wax string method seemed the least messy, the most flexible and was a technique I was familiar with.

My poor kids. They are getting used to hearing, "Hey everyone, put on your shoes, we are running up to Michael's." So off we went, and although no longer carried at Michaels, the wax string was found at the adjacent party store.

A step-by-step of how I created the embossed/debossed leather (can't decide which it is technically) is below. I had intended to cut the leather into rectangles, paint them and connect them together in the same fashion as Eva's piece. However, I found that I am really drawn to this piece of leather and its texture and am going to sit it aside and play with its use in my brain for a while.

1. Lay the waxed string across the backside of a piece of 2-4 ounce vegetable tanned leather. Press firmly to keep the string in place.


2. Paint 1/4 of the leather and strings with a thin coat of leather glue, I prefer Tandy's Leather Weld. Lay a 1 ounce piece of leather over the strings, backside down, and use a wet paper towel to gently press the leather down, wetting it so it becomes flexible and defining the outlines of the string at the same time.

3. Use dapping punches, chasing tools or leather modeling tools to press the leather down into the recesses. You will need to go over the sections several times as the leather will keep pulling from its neighboring recesses as you stretch it. I found that pressing on both sides of the string helped stretch the leather evenly.


4. Glue and wet the next 1/4 section and repeat.


5. When I finally do a finished project, I will need to determine how I will deal with the cut edges. I will likely pull the leather up, trim the string and glue the leather back down flat. I'm also curious to see if the wax migrates to the surface of the leather and stains it. This will cause blemishes if I use a water-based dye or may prevent adhesion if I use an acrylic leather paint. I'll share the results when I get there!


I know I still owe you a post on how to create line art from paintings (see my last blog post). I recently took apart my etching tank for a good cleaning an once I get it back together I will get on it. It's a fun exercise and I look forward to sharing it.

Thanks for stopping by. Create Recklessly this weekend!

Melissa

PS - Stop by my daughter's new blog "Diary of a Cursed Brother" and see her new project. November is National Novel Writing Month and it is a great time to get writing!